How to Cut Cat Nails: 7 Easy Steps for Stress-Free Trimming
Learning how to cut cat nails is an essential skill every cat owner should master. Regular nail trimming not only protects your furniture and skin from scratches but also promotes your feline companion’s overall health and comfort. Many pet parents feel intimidated by the prospect of nail trimming, but with the right approach and techniques, you can transform this necessary grooming task into a calm, bonding experience.
Understanding how to cut cat nails properly requires patience, preparation, and the correct tools. This comprehensive guide will walk you through every aspect of feline nail care, from recognizing when trimming is necessary to mastering the technique that keeps both you and your cat relaxed throughout the process.
Table Of Contents:
Understanding Cat Nail Anatomy
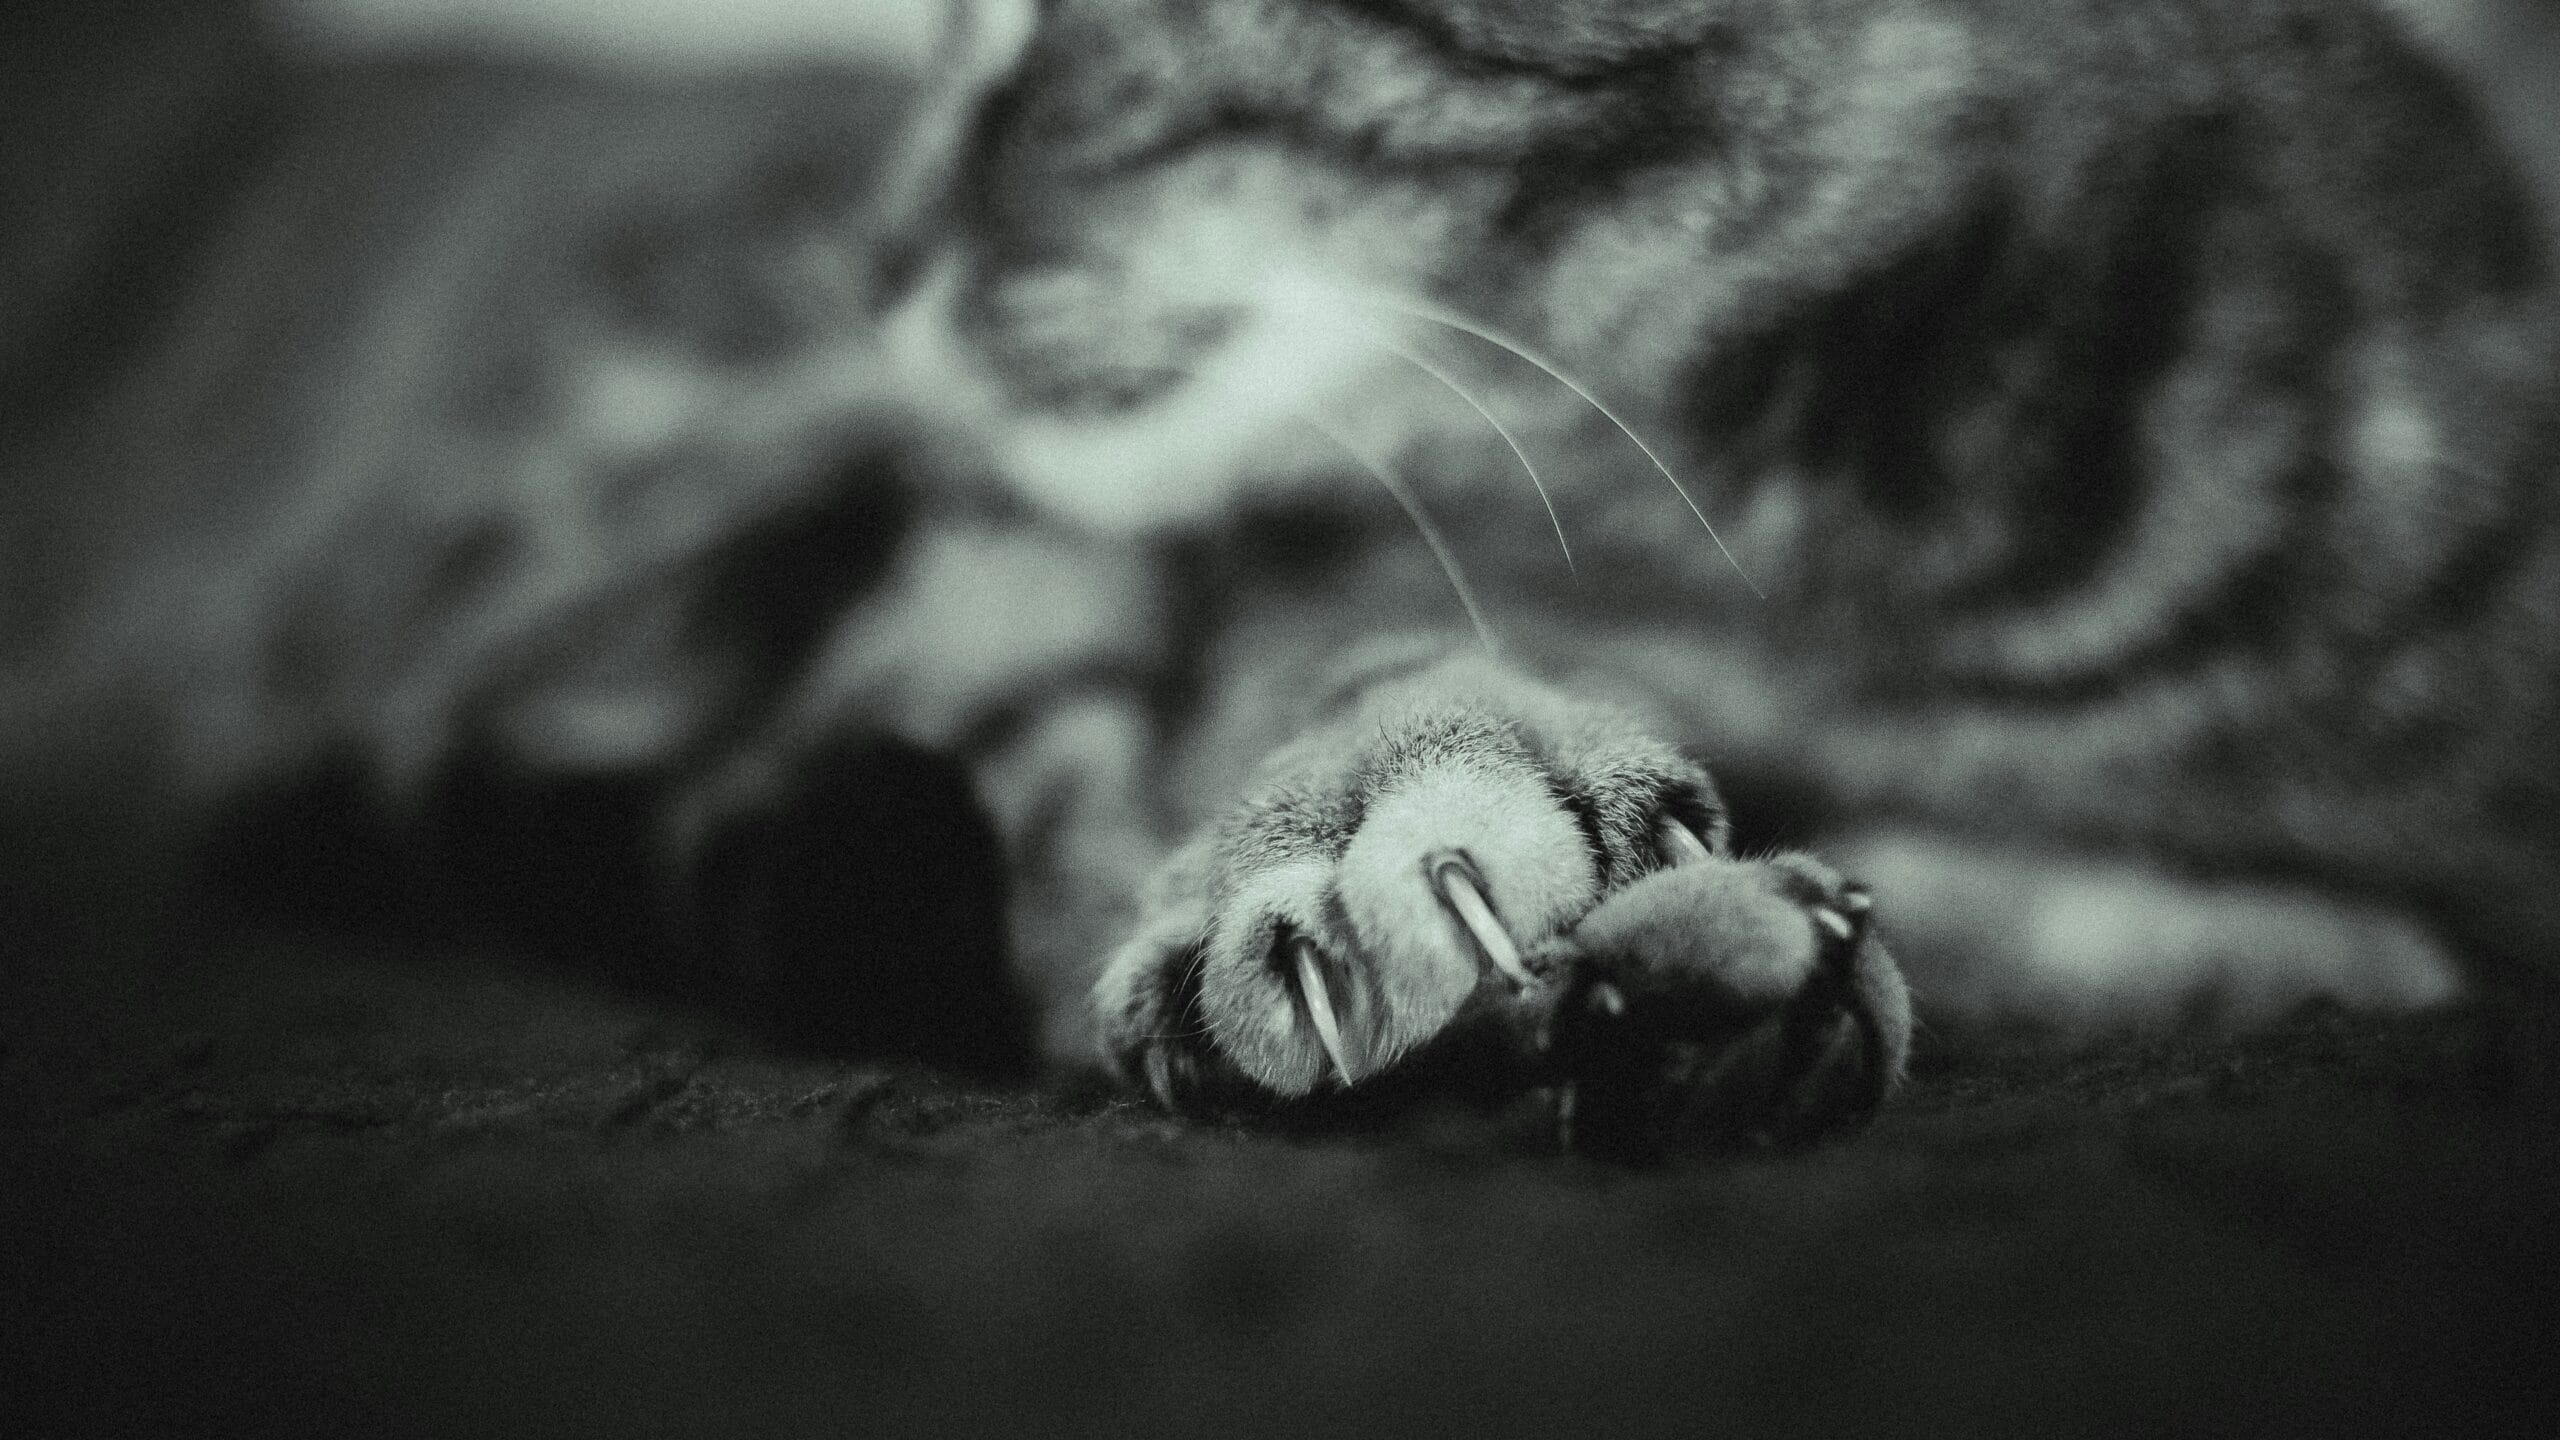
Before diving into how to cut cat nails, it’s crucial to understand the structure of feline claws. Cat nails consist of several layers, with the outermost sheath naturally shedding as cats scratch and climb. The pink area visible inside the nail, called the quick, contains blood vessels and nerve endings that make it extremely sensitive.
The translucent or white portion of the nail represents the safe cutting zone, while the pink quick should never be trimmed. Understanding this anatomy is fundamental to learning how to cut cat nails safely and effectively.
The Natural Shedding Process
Cats naturally maintain their claws through scratching behaviors, which helps remove the outer nail sheaths. However, indoor cats often require additional assistance through regular trimming to prevent overgrowth and potential health complications.
Signs Your Cat Needs Nail Trimming
Recognizing when your cat needs nail trimming is the first step in mastering how to cut cat nails effectively. Several indicators suggest it’s time for a trim, including nails that catch on fabric, carpeting, or upholstery.
Behavioral Indicators
When cats struggle to retract their claws fully or show difficulty walking on hard surfaces, these behaviors often indicate overgrown nails. Additionally, if your cat’s scratching becomes more aggressive or frequent, longer nails might be causing discomfort.
Physical Signs to Monitor
Inspect your cat’s paws regularly for ingrown nails, which occur when overgrown claws curve back toward the paw pads. This painful condition requires immediate attention and reinforces why learning how to cut cat nails is so important for feline welfare.
Essential Tools for Nail Trimming
Success in how to cut cat nails depends heavily on having the appropriate equipment. Invest in high-quality nail clippers specifically designed for cats, as human nail clippers can crush or split feline nails.
Types of Cat Nail Clippers
Guillotine-style clippers work well for small to medium-sized nails, while scissor-type clippers offer more control for precision cutting. Some pet owners prefer grinder-style tools, though these require gradual introduction due to their noise and vibration.
Additional Supplies
Keep styptic powder on hand in case of accidental quick cuts, and consider having treats readily available for positive reinforcement. A comfortable towel for wrapping anxious cats can also prove invaluable when learning how to cut cat nails on resistant felines.
Preparing Your Cat for Nail Trimming
Preparation is arguably the most critical aspect of how to cut cat nails successfully. Start by acclimating your cat to paw handling during calm, relaxed moments when they’re naturally receptive to touch.
Desensitization Techniques
Begin by gently touching and massaging your cat’s paws during regular petting sessions. Gradually progress to extending individual toes and exposing the nails without actually trimming them. This desensitization process may take several weeks but significantly improves cooperation during actual trimming sessions.
Creating the Right Environment
Choose a quiet, well-lit area free from distractions and loud noises. Many cat owners find that natural lighting provides the best visibility for distinguishing between the nail’s safe cutting zone and the sensitive quick.
Step 1: Positioning and Restraint
The first step in how to cut cat nails involves proper positioning that ensures both safety and control. Seat yourself comfortably with your cat positioned securely on your lap or on a stable surface at an appropriate height.
For cooperative cats, a simple lap position works perfectly, while more resistant felines may require gentle wrapping in a towel, leaving only the paws exposed. This “purrito” technique helps anxious cats feel secure while preventing scratching during the trimming process.
Handling Techniques
Support your cat’s body firmly but gently, avoiding any restraint that causes panic or distress. Your non-dominant hand should control the paw being trimmed while your dominant hand operates the clippers.
Step 2: Exposing the Nail
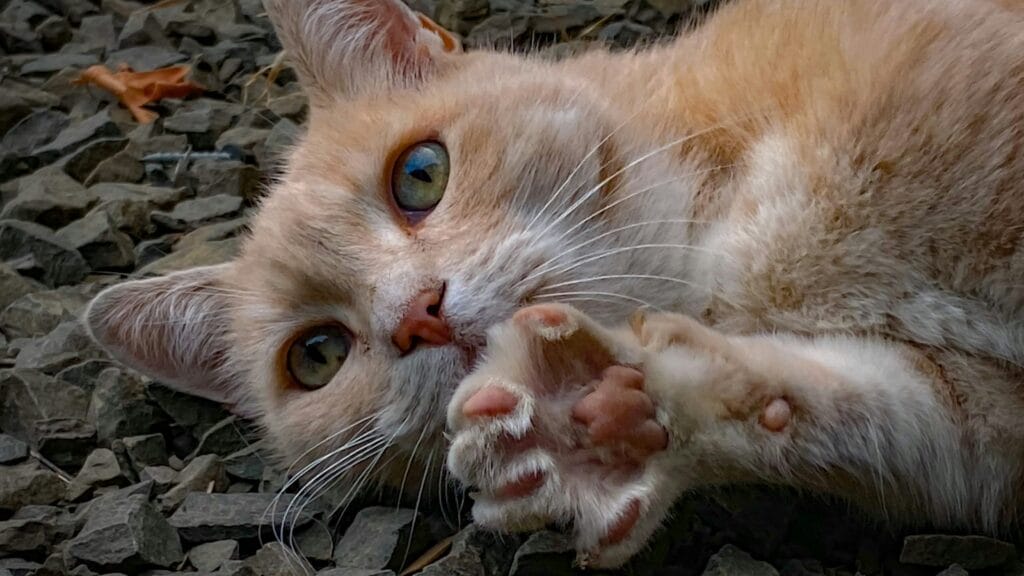
Learning how to cut cat nails requires mastering the technique of nail extension. Gently press on the paw pad behind the nail while simultaneously pushing slightly on the top of the toe. This dual pressure causes the retractable claw to extend fully.
Practice this motion repeatedly before attempting any cutting, as smooth nail extension is crucial for safe, effective trimming. Some cats naturally resist nail extension, so patience and gentle persistence are essential.
Common Extension Mistakes
Avoid applying excessive pressure, which can cause discomfort and resistance. Similarly, never force nail extension if your cat shows signs of significant distress, as this can create lasting negative associations with the trimming process.
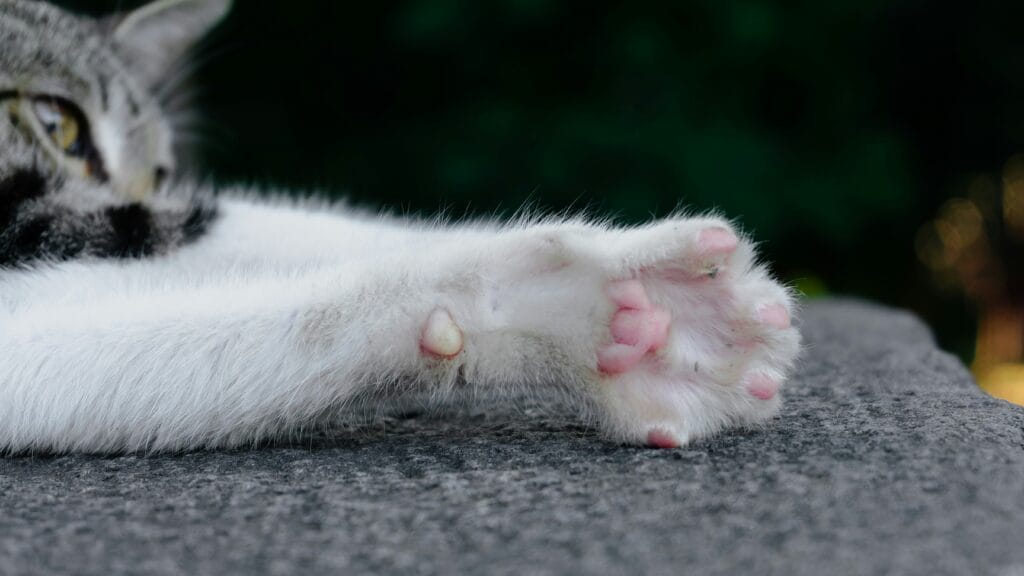
Step 3: Identifying the Cutting Zone
Understanding how to cut cat nails safely requires accurate identification of the appropriate cutting zone. The translucent or white portion of the nail represents the safe area for trimming, while the pink quick must remain untouched.
Hold the nail up to the light source to clearly distinguish between these zones. When in doubt, err on the side of caution by trimming less rather than risking injury to the sensitive quick.
Visual Cues for Safe Cutting
Look for the natural curve of the nail, typically cutting just beyond the sharpest point. The goal is removing the needle-sharp tip while preserving adequate nail length for natural cat behaviors like climbing and defensive scratching.
Step 4: Making the Cut
The actual cutting motion in how to cut cat nails should be swift, confident, and decisive. Position the clippers perpendicular to the nail, ensuring clean cutting rather than crushing or splitting the nail structure.
Apply steady pressure while squeezing the clipper handles together in one smooth motion. Hesitation or multiple partial cuts can cause nail splitting and discomfort for your feline companion.
Cutting Angle Considerations
Maintain a straight cutting angle rather than attempting to angle the cut. This approach produces the cleanest results and reduces the likelihood of creating sharp edges that might catch on surfaces.
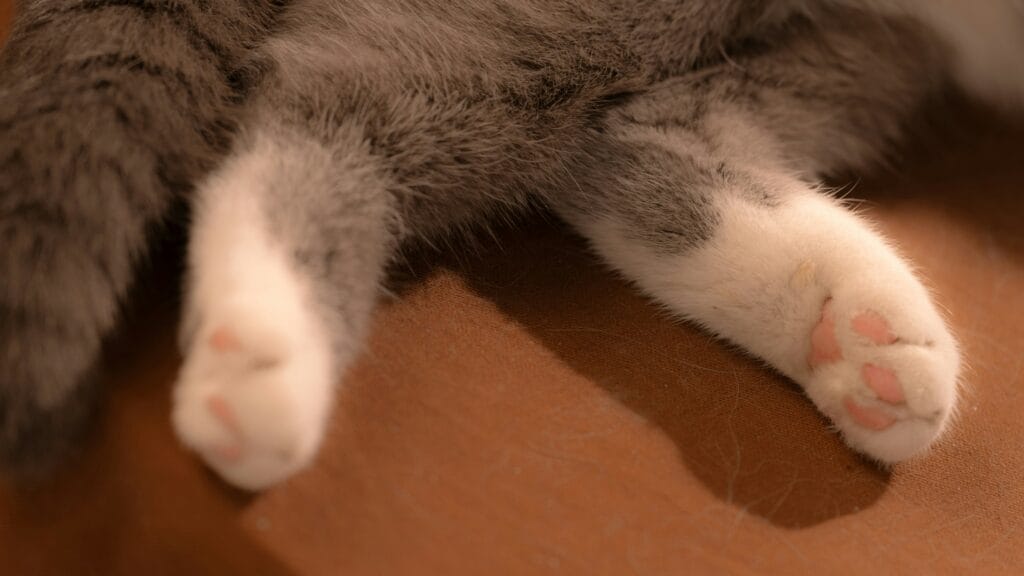
Step 5: Checking Your Work
After each cut, examine the nail closely to ensure clean, smooth cutting without any splitting or crushing. The cut surface should appear even and free from rough edges that might snag on fabric or carpeting.
If the cut appears uneven or rough, you may need to make minor adjustments with very careful additional trimming. However, avoid over-cutting, which increases the risk of reaching the sensitive quick.
Post-Cut Nail Inspection
Look for any signs of bleeding or distress in your cat, though minor stress reactions are normal during initial trimming sessions. With practice, both you and your cat will become more comfortable with the process.
Step 6: Moving to the Next Nail
Successful execution of how to cut cat nails involves systematic progression through each toe. Most cats have five toes on their front paws and four on their back paws, though polydactyl cats may have additional digits requiring attention.
Work methodically from one toe to the next, maintaining the same gentle pressure and cutting technique. Take breaks if your cat becomes overly stressed, as rushing through the process often leads to accidents or negative associations.
Paw-by-Paw Strategy
Many cat owners find success in trimming one complete paw per session, especially when first learning how to cut cat nails. This approach prevents overwhelming anxious cats while ensuring thorough nail maintenance over time.
Step 7: Positive Reinforcement and Rewards
The final step in how to cut cat nails involves immediate positive reinforcement to create pleasant associations with the trimming process. Offer high-value treats, gentle praise, and affection immediately following each successful trimming session.
This positive conclusion helps ensure future cooperation and gradually transforms nail trimming from a stressful ordeal into an acceptable routine grooming activity.
Building Long-Term Success
Consistency in rewards and gentle handling techniques builds trust over time. Even cats who initially resist nail trimming can learn to tolerate and even enjoy the attention and treats associated with the process.
Common Mistakes to Avoid
Learning how to cut cat nails effectively requires understanding frequent pitfalls that can complicate the process. Never attempt trimming when your cat is agitated, overstimulated, or in an unfamiliar environment.
Timing Considerations
Avoid nail trimming immediately after meals, during active play periods, or when your cat shows signs of stress from other sources. The ideal timing is when your cat is naturally calm and relaxed.
Technical Errors
Cutting too much nail at once represents the most common and dangerous mistake in how to cut cat nails. Always err on the side of conservative trimming rather than risking injury to the quick.
Dealing with Accidents
Despite careful preparation and technique, accidents occasionally occur when learning how to cut cat nails. If you accidentally cut the quick, remain calm and apply styptic powder to stop bleeding immediately.
Most quick injuries heal quickly and cause minimal long-term problems, though they may increase your cat’s resistance to future trimming sessions. Extra patience and positive reinforcement help rebuild trust after accidental injuries.
Emergency Response
Keep styptic powder or cornstarch readily available to address bleeding quickly. Apply gentle pressure with a clean cloth if bleeding persists beyond a few minutes.
Frequency of Nail Trimming
Understanding how often to cut cat nails depends on various factors including age, activity level, and natural nail growth rates. Most indoor cats benefit from trimming every two to three weeks, while outdoor cats may require less frequent attention due to natural wearing.
Individual Variation Factors
Senior cats often need more frequent trimming due to reduced activity levels and scratching behaviors. Conversely, young, active cats may naturally maintain shorter nails through vigorous play and scratching.
Alternative Approaches for Difficult Cats
Some felines remain consistently resistant to traditional nail trimming approaches, requiring modified techniques for successful how to cut cat nails execution. Consider gradual desensitization programs that extend over several months.
Professional Assistance Options
Veterinary clinics and professional groomers offer nail trimming services for particularly difficult cats. This option ensures proper technique while preventing stress-related behavioral issues.
Sedation Considerations
In extreme cases, veterinarians may recommend mild sedation for cats with severe nail trimming anxiety, though this approach should be reserved for situations where neglecting nail care poses health risks.
Maintaining Nail Health Between Trimmings
Proper nail care extends beyond knowing how to cut cat nails to include providing appropriate scratching surfaces and monitoring for potential problems. High-quality scratching posts encourage natural nail maintenance behaviors.
Scratching Post Selection
Choose scratching surfaces that allow full-body stretching and provide adequate resistance for effective nail conditioning. Sisal rope, corrugated cardboard, and natural wood represent excellent options for different feline preferences.
Environmental Enrichment
Multiple scratching options throughout your home encourage regular natural nail maintenance, reducing the frequency of required trimming sessions while promoting overall feline wellness.
When to Seek Professional Help
Certain situations warrant professional intervention rather than attempting how to cut cat nails at home. Severely overgrown nails, ingrown nails, or signs of infection require veterinary attention.
Warning Signs
Look for swelling, discharge, persistent bleeding, or signs of pain when handling your cat’s paws. These symptoms suggest underlying health issues requiring professional diagnosis and treatment.
Regular Veterinary Care
Annual wellness examinations should include nail assessment, providing opportunities for professional guidance on proper trimming techniques and frequency recommendations.
F A Q
How often should I cut my cat’s nails?
Most indoor cats need nail trimming every 2-3 weeks, while outdoor cats may need it less frequently due to natural wearing from climbing and scratching on rough surfaces.
What happens if I accidentally cut the quick?
Apply styptic powder immediately to stop bleeding. The injury will heal quickly, but your cat may be more resistant to future trimming. Extra patience and treats help rebuild trust.
Can I use human nail clippers on my cat?
It’s not recommended. Human clippers can crush or split cat nails. Invest in proper cat nail clippers designed specifically for feline claw structure and thickness.
My cat won’t let me touch their paws. What should I do?
Start with gradual desensitization by gently touching paws during relaxed moments over several weeks. If resistance continues, consider professional grooming services or veterinary assistance.
Did you enjoy this article?
Help other pet lovers benefit too — Share it on social media! 🐾💚
Leave a Reply